Adobe© Illustrator© Project
Isometric Drawings
Illustrator has a great 3D Effect command which can create isometrics or other axonometric drawings. However, you may have a more complex project which requires working from scratch. The following steps will guide you through the basics for creating an isometric drawing from 2-D dimensions.
1. Begin by creating orthographic (2-D) outlines of basic geometry sections.

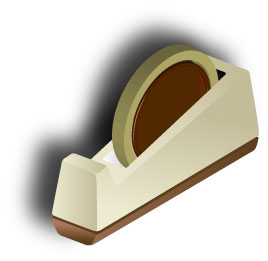
2. Arrange related geometry to assembly a section. I will be using the top-most section of the tape dispenser for this demonstration.

3. Scale the geometry non-uniformly. 100% horizontal and 86.602% vertical.

4. Next, Shear 30 degrees for right-side viewing (or -30 degrees for left-side).

5. Next, Rotate -30 degrees for right-side viewing (or 30 degrees for left-side).
TIP: Create an Action of steps 3-5 for using on multiple sections of geometry.

6. Move the top geometry up in the X direction. Copy the top geometry, you'll need it on the clipboard for step 9.

7. Use the Pathfinder to 'Add to Shape Area', and click Expand.

8. Delete extraneous points to create the basic shape of one section.

9. Paste the top geometry from step 6 with the Paste in Front command.


11. In this section, it was necessary to move the front of the top geometry down in the X direction to create a slope.


